
Murderthon Masks Guide
Killer kits, free starters, talent trees, and how each Mask closes trials.
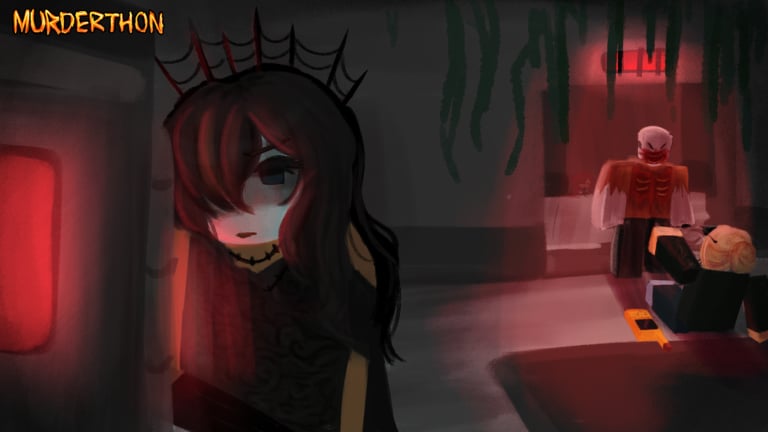
Masks are the killer side of Murderthon—the 4v1 asymmetrical horror trial from Chilly Creations. While survivors repair five generators and race for the exit, the Mask’s job is to injure, down, and feed survivors into the electric chair until the lobby is empty. Every Mask shares basic hunting tools (terror pressure, scratch-mark reading, attacks, and chair carries), but the signature ability and perk identity decide whether you win through traps, rushes, teleports, stealth, infection denial, or route control.
This page covers the complete alpha roster of nine Masks: free starters Fate and Ripe, snowball chase threats like Sin, gen-control specialists like Pierce, ranged pressure from Sheol, community-infamous Jammed, vent controller Divide, information-based Lens, and released infection-leaning Plague. Each Mask now has a three-row talent tree with nine levels—unlock rows sequentially to access deeper powers. The Mask of Slasher Roblox event window (listed Mon Aug 31, 2026) is recent live-ops context; re-test kits after that drop without trusting invented cooldown charts. For survivor counters, open the Classes guide. For ranking snapshots, use the mask tier list. For practical killer fundamentals, continue into the killer guide. For the event checklist, see Mask of Slasher Update.
Shared killer fundamentals
A Mask win is a resource race. Survivors need five completed gens; you need downs that convert into chairs before power turns on. Respect the survivor state ladder: Healthy → Injured → Downed → Chaired. Chairs are your scoring beat—missed chairs and slow carries are how Mechanic lobbies escape. Watch sprint scratch marks, listen for vaults and vents, and do not tunnel one survivor so hard that three generators finish behind you.
Each Mask now has Core Talents organized in three columns with up to nine levels. You can equip one talent per column, and the purchase system works in rows—unlock row one first to access subsequent rows. This talent system affects every Mask’s playstyle significantly.
Alpha balance moves quickly. Treat any single “best Mask” claim as temporary, re-check after patches on the Updates hub, and verify perk numbers in-game. Free Masks (Ripe, Fate) cost nothing; other Masks commonly sit around ~5,000 Shards in Lorenz’s shop (prices have fluctuated between 4K-7K across patches). The embedded video on this page is a perk-focused companion, not a substitute for learning each kit’s timing windows.
Fate — bear traps and area denial (free)
Fate is a free, trap-oriented Mask built around bear traps and area denial. You place and reset traps to freeze survivors in place, punish greedy generator paths, and create free downs when a snared survivor takes a hit. The trap cooldown was recently reduced from 20s to 15s, and trap disarm duration increased from 2.5s to 3s. Fate now gains a speed boost for 2 seconds when placing or picking up a trap. Max traps decreased from 8 back to 6.
Fate teaches set-play hunting. Spend early trial time seeding traps while survivors spread. Once someone screams in a trap, decide whether to cash the down immediately or use the panic to cut off the nearest teammate. Fate falls behind if you never chase—traps alone do not chair people—but Fate also loses if you abandon the trap web and play pure M1 forever.
Talent highlights: Trap size increases with levels, trapped survivors take longer to escape, and trap placement becomes more efficient.
Survivors counter Fate with careful pathing, disarm habits, and Classes like Recon (info) or Handyman (safer loops). Your answer is trap density on the tiles they must use, not random placement in dead corners.
Ripe — madness spit and post-hit stealth (free, beginner)
Ripe is the other free Mask and the usual beginner recommendation. The kit leans madness / hallucination pressure through a blood spit style attack, then rewards landing hits with stealth windows that drop your terror profile. Ripe teaches the core Mask loop: injure, disappear, reappear on a second target, and refuse to donate free information.
Key changes: Ripe now has three hallucination clones that track survivors and last a second longer than before. Madness duration increased from 10s to 20s. Think Straight (stand still to remove Madness) duration decreased from 8s to 6s. Blood Spit hit radius decreased from 12 to 8 studs. The Madness status effect prevents survivors from using their Class gadget while active.
Use spit to interrupt generator commits and force survivors off objectives. After a hit, take the stealth window to break chase lines or set an ambush instead of greedily swinging into a pallet. Ripe is forgiving because you can reset presence, but you still lose if you ignore generators completely.
Talent highlights: Splash radius increases, Madness duration scales, and clone behavior improves with levels.
Ripe is soft-countered by disciplined Recon pings and players who do not panic during Madness. Against Cloaker, do not waste stealth into another stealth game—force interactions around generators and chairs.
Sin — Mi Dolor rush and fast downs
Sin is a fast, snowball Mask. The signature Mi Dolor rush is a committed sprint swing that can down survivors immediately on connect, shred pallets on contact, and continue through vents with rush-vent behavior—while punishing whiffs with stun risk. Sin is for players who want short chases and decisive ends.
Major rework: Sin’s Mi Dolor ability was reworked. The ability can now break pallets and Sin can control direction with slower sensitivity. Wall running tech was removed. All animations were reworked. A progress bar now shows how long until the ability runs out. Cooldown increased from 15s to 20s (later adjusted to 25s). Ability duration increased from 3s to 5s. Stun duration after the ability ends increased from 1.5s to 2.3s. Perk cooldown increased from 8s to 15s (then to 25s).
Win condition: open with pressure, land Mi Dolor on predictable vault lines, and convert the first down into a second before Medics stabilize. Sin snowballs hardest when survivors pre-drop and run linear tiles. Sin struggles when survivors hold pallets patiently and bait the rush into walls.
Talent highlights: Being stunned applies Vulnerable to the survivor who stunned you, and speed boost mechanics scale with levels.
Draft note for survivors reading this page: Handyman and Enforcer matter more against Sin because restored tiles and blinds punish greedy rushes. See Classes for gadget answers.
Pierce — teleport to incomplete gens
Pierce is a high-mobility control Mask. The kit teleports toward incomplete generators, then leverages chair success into generator blocks that stall repair progress. Pierce is the “be everywhere” answer to Mechanic lobbies that try to finish five gens on the far side of the map.
Key changes: Pierce teleport speed decreased from 4.59s to 2.65s (significant QoL improvement). Perk reworked: instead of blocking all gens on chair for 12s, it now blocks the 3 nearest generators when chaireing a survivor for 25s. Perk cooldown increased from 30s to 45s. Addons completed for Pierce.
Play Pierce by threatening unfinished gens instead of camping one tile forever. Appear on a gen, force a hit or a drop, leave, and reappear where progress is highest. After a chair, use block windows to freeze the three closest repair sites and force survivors into bad rotations.
Talent highlights: Down bad talent now regresses nearby generators by 7.5% when putting a survivor into dying state (up from 5%). Kicking a generator reveals survivor aura on nearest gen.
Pierce counters stacked repair comps and rewards macro awareness. Pierce loses value if you never secure chairs, because the strongest stall tools often arm after a successful hook cycle. Lens players who like information pressure sometimes graduate into Pierce for harder gen denial.
Sheol — ranged pressure and area control
Sheol sits in the ranged plus area-control lane. Instead of living only on M1 paths, Sheol pressures from distance and shapes where survivors are allowed to stand. That identity makes Sheol strong on open sightlines and awkward on ultra-tight tile spam if you cannot create shooting angles.
Major rework: Sheol ability was reworked. Max studs card distance increased dramatically from 65 to 150 studs. Perk cooldown increased from 15s to 45s. Sheol can no longer have more than 3 cards. Card throwing now goes to cursor instead of random. Heavenly Harm (holding card out) now hinders Sheol by 15% with lingering effect.
Use ranged tools to injure before the chase starts, then close for the down. Area control pieces should cover unhooks, gate approaches, or the strong vault the lobby keeps returning to. Sheol players who only shoot and never chair will bleed games to generator completion.
Talent highlights: Cards can now break generators with a specific talent, footstep quiet when card is out, and undetectable bonuses.
Jammed — cuffs, stillness stealth, community hate magnet
Jammed is the restraint Mask. Cuffs lock a healthy or injured survivor out of most interactions while still allowing movement, and teammates must spend time uncuffing. The stealth-after-still identity lets Jammed erase presence and reappear for jumpscare hits.
Major rework: Jammed’s cuff was changed from a stance to a swing (M1 to swing at survivor, if hit you can cuff them successfully). Cuff duration increased from 30s to 40s. Cuff cooldown increased from 60s to 75s. Cuffed survivors near 75 studs of you are now highlighted. Endurance forcefield now blocks cuffing. Perk lingers for 5 seconds (or 10 if survivor was injured).
Play Jammed by cuffing the right target (the Saboteur walking to a chair, the Mechanic on a nearly done gen, the Medic mid-heal). Do not cuff randomly if three generators are about to pop. Use undetectable windows to cross open ground without announcing your route. Sound notification plays when a survivor gets uncuffed.
Talent highlights: Triple Trouble talent now also reduces cuff cooldown by 15 seconds.
Survivor answers are coordination and Recon. If your lobby refuses to uncuff and keep repairing, Jammed wins on pure tempo theft.
Divide — Isolate and Lingering vent control
Divide owns vents. Isolate temporarily closes a vent you look at. Lingering arms a vent so survivors who pass through become hindered and fog-limited, while Divide can gain haste by using the same prepared vent. On maps where vents are the primary chase reset—West Park included—Divide deletes the survivor escape button.
Key changes: Isolate cooldown decreased from 30s to 20s. Lingering cooldown decreased from 60s to 40s. Vent ability usage stud distance increased from 85 to 95 studs. Shorter to use Isolate ability. Going through a Lingering vent now gives you a speed boost for the same duration as it slows survivors. Vent closed by Divide is now yellow instead of purple.
Talent highlights: After hitting a survivor, your next Lingering effect applies Paranoid for 30 seconds (up from 7.5s).
Divide is a timing Mask. Close the vent as someone commits, or leave Lingering on the obvious escape pipe and force a bad decision. If survivors stop using vents entirely, rotate into normal chase and chair pressure—your denial already succeeded by removing a resource.
Handyman and careful looping matter more when vents are unreliable; Cloaker can still disengage without vents, so do not assume Divide auto-wins every stealth lobby.
Lens — cams, teleport info, glass-cannon concerns
Lens is an information and teleport Mask. Camera-style tools and relocation tricks create a “I already know where you are” fantasy, which is powerful in alpha pubs where survivors rarely mute their habits. This is the ninth Mask added to the roster.
Surveillance Ability: Toss a heavy portable camera that can be viewed at anytime. Hold M1 in Camera mode to shoot forward (shoot cooldown is 10 seconds). If a survivor is in the crosshair when Camera fires, it will infect the Survivor with Wire-Frame which will hover behind the survivor for 45 seconds and highlight them for the first 5 seconds. Survivors can pickup the Camera individually to relocate it. Lens can use the camera while it’s being carried. Camera highlights to Lens if not on cooldown, but while on cooldown Lens cannot enter the camera.
Glass Cannon Ability: Lens aims her Arm’s Glass Cannon device forward. She can fire at the camera (within 85 studs) in her line of sight to retrieve the camera. If the Glass Cannon is aimed at a Wire-Framed Survivor, she will instead Teleport to the survivor’s location during the start of the teleport. Once teleport finishes, she will be afflicted with 25% slowness for 2 seconds. Glass Cannon goes on cooldown after teleporting (10 seconds).
Perk (60s cooldown): If a Survivor fails any skill check they will suffer from Oblivious (cannot hear Terror Radius) and Vulnerable for 10 Seconds.
West Park’s open gens and repeated lawn paths are classic Lens food. The tradeoff players complain about is glass-cannon fragility: if Lens misses the info advantage and gets stuck in fair loops, the kit can feel thinner than Sin or Pierce.
Play Lens by converting knowledge into hits within seconds. Information that does not become a down is just a light show. Use teleport tools to punish unfinished generators the same way Pierce does, but lean harder on prediction and surveillance.
If you like Lens’s brain-game style but want harder stall after chairs, practice Pierce next. If you want simpler snowball, go Sin or Ripe.
Plague — infection and area denial
Plague is a released Mask aimed at infection / area denial. Community match footage shows the kit pressuring clustered survivors and lingering in contaminated or paranoia-heavy spaces rather than winning only as a pure M1 rusher. Commenters have called out harsh permanent-paranoia style feels and later noted rebalances—exactly the alpha pattern of ship, overtune or undertune, then retune.
Play Plague as a zone tax: punish triple-stacked generators, greedy heal huddles, and survivors who refuse to leave dirty ground. Exact live numbers change—confirm tooltips after every patch, especially around the Mask of Slasher window and September 2026 hotfixes. Do not memorize a fan spreadsheet as gospel.
Survivor answers lean on split repairs, disciplined leaves from bad zones, and Classes that restore tempo (Medic stabilization, Recon information, Cloaker disengage). When Plague receives another balance pass, re-check this page and the mask tier list before locking a new main.
Talent system overview
Every Mask now has access to Core Talents across three columns:
- Column 1: Entry-level talents unlocked from the start
- Column 2: Mid-tier talents requiring row 1 completion
- Column 3: Signature talents (extra 3 talents per Mask, latest addition)
Max level is 9 until Part 3 of the overhaul. Killer EXP requirements for talents are lowered by approximately 25%, making it easier to unlock Mask talents.
Shared Mask talents include:
- Vulnerable: A basic attack will put the survivor into the dying state
- Hemorrhage: Blood pools occur 35% more frequently and heal progress regresses by 7% per second
- Paranoid: Forces survivor into first-person perspective for the duration
Mask of Slasher update focus (live-ops, not a fake kit card)
The Roblox page listed Mask Of Slasher Update for Monday, August 31, 2026. Treat that as a re-test checkpoint for the whole killer roster—not as permission for wikis to invent Slasher cooldowns. After the drop (and later Updated stamps), verify shop entries, tooltips, West Park tiles, and whether Plague or other Masks feel retuned. Full checklist: Mask of Slasher Update. Patch verification habits: patch notes.
How to pick a Mask in alpha
- New to killers: start Ripe, then Fate once you understand trap tiles.
- Want fast downs: learn Sin rush lines and whiff punishment.
- Want macro control: Pierce or Divide depending on whether gens or vents annoy you more.
- Want pub stomps through denial: Jammed—expect salty survivors.
- Want ranged / info fantasy: Sheol or Lens, accepting higher execution demand.
- Want infection / zone tax: learn Plague, then re-check after each rebalance.
Always redeem shard codes when they appear on the Codes hub if you still need to unlock paid Masks (~5K Shards each is the common shop ballpark), then practice one kit for a full session instead of swapping every trial.
Related pages
Counterpick with the Classes guide, track rankings on the mask tier list, build fundamentals in the killer guide, and study West Park when teleport, cuff, cam, or vent kits are in the lobby. After any balance patch or Slasher-themed drop, skim patch notes and the Mask of Slasher checklist before you trust yesterday’s matchup chart.
Frequently Asked Questions
Quick answers for Murderthon survivors and Masks.
Which Murderthon Masks are free?
Fate and Ripe are the free starter Masks. Fate focuses on bear traps and area denial; Ripe focuses on madness pressure and post-hit stealth, and is the usual beginner pick. Other Masks commonly cost about 5,000 Shards.
How many Masks are in Murderthon now?
There are nine Masks: Fate, Ripe, Sin, Pierce, Sheol, Jammed, Divide, Lens, and Plague. Lens was added as the ninth Mask with camera surveillance and teleport abilities.
What does Mask of Lens do?
Lens has two abilities: Surveillance (toss a camera that Wire-Frames survivors) and Glass Cannon (teleport to Wire-Framed survivors or retrieve camera). Her perk causes survivors who fail skill checks to suffer Oblivious and Vulnerable for 10 seconds.
What is the new talent system for Masks?
Every Mask now has Core Talents in three columns with up to nine levels. You equip one talent per column and unlock rows sequentially. Killer EXP requirements are lowered by ~25% to make progression easier.
Is Plague playable right now?
Yes—Plague is released in the live alpha and appears in community footage as an infection / area-denial Mask. Expect rebalances; verify numbers in your client rather than trusting old spreadsheets.
What is the Mask of Slasher Update?
A Roblox-listed event window on Monday, August 31, 2026. Use it as a signal to re-test Mask kits, maps, and codes. This roster page does not invent Slasher ability numbers.
How should I learn Masks as a new killer?
Main Ripe until you can injure, reset presence, and chair without losing three generators. Then add Fate for trap macro or Sin for chase aggression. Use the killer guide for shared fundamentals and the mask tier list for current strength checks.