
Murderthon Survivor Classes
Gadgets, unlocks, and roles for every Class in the 4v1 trial.
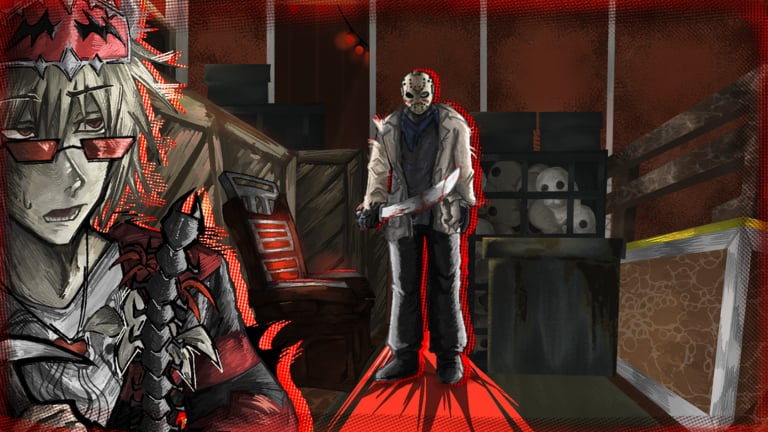
In Murderthon, the four survivors are not identical runners. Each player picks a Class before the trial starts, and that Class brings one signature gadget that changes how you repair generators, break chase, heal, or deny the Mask. Your shared win condition stays the same—fix five generators, open the exit, and leave—but the toolkit you bring decides whether the lobby snowballs or collapses after the first chair.
This page is the full English Class roster guide for the current alpha: Medic, Handyman, Saboteur, Recon, Enforcer, Mechanic, and Cloaker. Four Classes are available from the start. Enforcer, Mechanic, and Cloaker are locked behind Missions, so new accounts should plan unlock order instead of assuming every gadget is open on day one. For Mask matchups and ranking context, pair this page with the Masks roster, the class tier list, the getting started walkthrough, and the looping guide.
How Classes fit the trial
Survivors move through health states in a hard ladder: Healthy → Injured → Downed → Chaired. A chaired survivor enters the electric-chair shock sequence and can die if nobody interrupts. Movement tools are shared across Classes: hold sprint and you leave scratch marks the Mask can read, crouch to quiet your profile, and use vaults and vents with angle-based speeds (slow, fast, or slide depending on approach). Gadgets never replace basic looping—they amplify it. If you waste pallets and vents, even Mechanic and Handyman cannot recover a dead map.
Class choice is a team draft, not a fashion pick. A lobby with zero information and zero healing is fragile against stealth Masks. A lobby with three gen specialists and no chase tools folds when Sin or Ripe force long pursuits. Aim for coverage: at least one info Class (Recon), one tempo Class (Mechanic or Handyman), and one save / anti-chair option (Medic or Saboteur). Locked Classes fill the remaining niches once Missions are done.
Medic — Medkit
Medic holds the Medkit. The kit unlocks a real self-heal action and lets you heal allies faster than a default altruistic heal. In alpha, that dual role matters because injured survivors are slower, louder in bad positions, and easier to tunnel into a chair. Medic is the Class that turns a one-hit chase into a second life instead of a guaranteed snowball.
Play Medic as a field medic, not a gen AFK. Pre-position near mid-map cover before you commit charges. Self-heal in the open is how you donate a free down. Heal Enforcer or Saboteur first when they just spent a strong gadget, because those Classes create value only when they are upright and mobile. Save a slice of Medkit capacity for endgame gates—final chases often start the moment power turns on.
Medic pairs well with aggressive Masks that force constant injuries (Sin rushes, Fate trap downs, Jammed cuff pressure). Against high stealth Masks, Medic alone is not enough; you still need Recon or good listening so you are not healing into an undetectable ambush.
Handyman — Hammer
Handyman brings the Hammer and specializes in repairing broken pallets. Pallets are limited resources in Murderthon. Once the Mask shatters a strong tile, that loop dies unless Handyman restores it. Restored pallets keep chase structure alive on maps like West Park where a few key drops control entire wings.
Use Hammer after a pallet has done its job, not as an excuse to pre-drop everything. Pre-dropping without pressure burns the only resource Handyman can rebuild. When charges run out, fragile restores are weaker—plan which tiles deserve full-value repairs. Handyman is the Class that makes looping guides practical: the looping guide assumes someone is maintaining tiles while others finish generators.
Handyman shines versus Masks that break pallets frequently or force repeated vault pressure. Against Pierce-style gen lockdown, Handyman still helps, but Mechanic or Saboteur may create more direct counterplay.
Saboteur — Wrench
Saboteur carries a Wrench built to sabotage electric chairs. When a teammate is hooked into the chair pipeline, Saboteur is the Class that contests the Mask’s payoff. Chair sabotage is not a free “press button to win”—you still need pathing, timing, and a teammate who buys a second of distraction—but it is the clearest anti-snowball tool in the free roster.
Play Saboteur as a second responder. Do not stand under every chair the moment a down happens; wait for the Mask to commit or leave, then wrench. If you die first every trial, your gadget never fires. Saboteur also pressures Masks that want fast four-kills: each failed chair cycle is more generator time for Mechanic and Recon.
Saboteur is especially valuable against Masks that get value from successful chairs (for example Pierce’s post-chair generator blocks). If your lobby already has strong heal and info, Saboteur is often the correct fourth pick.
Recon — Pinger
Recon uses the Pinger to reveal the Mask’s location. Information wins alpha lobbies because terror radius and scratch-mark reading are imperfect, and several Masks can go stealth or relocate instantly. A clean ping converts “we think the Mask is east” into “leave that generator now.”
Ping with purpose. Reveal before a risky heal, before a chair save, or when a teammate is about to commit a long generator. Spam pinging without follow-up just teaches the Mask your timing. Recon should still touch generators; pure aura-bot play loses if three teammates are dead.
Recon is the default answer to Ripe, Jammed, and other stealth-ambush kits, and it remains useful against Pierce and Lens because teleport Masks create false safety on unfinished gens. Cross-check Mask specifics on the Masks page.
Enforcer — Headbang (Mission unlock)
Enforcer is locked behind Missions and brings Headbang, a gadget that can blind the Mask. Blind windows are chase resets and save openings. Enforcer is the Class you unlock when your lobby keeps losing because nobody can contest a committed chase or locker check.
Treat Headbang as a tempo interrupt, not a panic button on cooldown. Blind when a teammate is about to go down, when you need to cross a dangerous tile, or when the Mask is mid-animation around a chair. Enforcer rewards players who already understand looping angles; the gadget multiplies good pathing and cannot fix bad pathing.
If you are learning Enforcer specifically, watch the embedded how-to video on this page, then practice in custom or casual trials until you stop wasting blinds on already-lost chases. After unlock, compare Enforcer’s place in the meta on the class tier list.
Mechanic — Toolbox (Mission unlock)
Mechanic wields the Toolbox to speed generator repairs. In a game that asks for five completed generators, raw repair speed is the most direct path to exit pressure. Mechanic is the unlock for players who want to end trials before the Mask stabilizes a two-hook lead.
Do not tunnel one generator alone in the corner of the map. Mechanic value scales when teammates are alive and when you rotate to contested, high-value gens. Great skill checks and coordinated doubles make Toolbox snowball; solo repairing while two teammates are down just feeds the Mask a free three-gen hold.
Mechanic counters slow, trap-oriented Masks that want the match to go long (Fate, area-control kits). Against hyper-aggro chase Masks, Mechanic still helps, but you need Handyman or Enforcer so the gen lead is not erased by back-to-back downs.
Cloaker — Stealth-Ploy (Mission unlock)
Cloaker is the third Mission-locked Class and uses Stealth-Ploy to go invisible and avoid chases. Cloaker is not a replacement for looping skill; it is a disengage and reposition tool. Use invisibility to break scratch-mark trails, cross open ground, or leave a dead tile without donating a free hit.
Cloaker falls apart if you treat stealth as immortality. Many Masks still find you through prediction, blood, or area denial. Exit stealth into cover, not into the Mask’s face. Cloaker is excellent for finishing late generators under pressure and for players who tilt when every trial becomes a five-minute chase.
Because Cloaker is locked, unlock it after you understand baseline movement from the getting started guide. Stealth without map knowledge just delays the same mistakes.
Draft tips and common mistakes
- Do not quad-stack the same niche. Four Medics still lose if nobody finishes generators.
- Unlock order: many players prioritize Mechanic for tempo or Enforcer for chase answers, then Cloaker for solo-queue safety. Adjust to your Mask preference and Mission requirements.
- Communicate. Gadgets are force multipliers for callouts. Recon pings plus Medic heals plus Saboteur chair timing is how alpha teams convert messy fights into escapes.
- Respect scratch marks. Sprint only when the distance gain is worth the information gift.
- Re-check balance after patches. Alpha Class numbers move. After any update, re-test heal speeds, toolbox rates, and Headbang windows, and skim patch notes plus the Updates hub.
Related pages
Use this Classes guide with the Masks roster for matchup thinking, the class tier list for ranking snapshots, getting started for day-one controls and objectives, and looping for pallet and vent fundamentals that every Class still needs.
Frequently Asked Questions
Quick answers for Murderthon survivors and Masks.
How many Classes are in Murderthon?
There are seven survivor Classes: Medic, Handyman, Saboteur, Recon, Enforcer, Mechanic, and Cloaker. Four are free at the start; Enforcer, Mechanic, and Cloaker unlock through Missions.
Which Class should beginners pick first?
Start with Medic or Recon. Medic teaches health-state management and altruism timing, while Recon teaches Mask tracking. Handyman is also strong if you already enjoy looping and want to rebuild pallets.
What do Enforcer, Mechanic, and Cloaker unlock from Missions?
Enforcer unlocks Headbang to blind the Mask. Mechanic unlocks Toolbox for faster generator repairs. Cloaker unlocks Stealth-Ploy for invisibility and chase avoidance. Complete the related Missions before you can select them in prep.
Do Classes change the win condition?
No. Survivors still need five generators and an exit (or a late hatch when you are last alive). Classes only change how you create time, information, saves, and map control while chasing that objective.
Where should I go after reading Classes?
Read the Masks guide for killer kits, then the class tier list for current rankings. Practice movement with the looping and getting started guides before grinding Mission unlocks.